Tattoo Removal - eyebrows, eyeliner, lips, tattooed beauty marks and small body tattoos with saline.
It is important to understand that tattoo removal is a process not a procedure.
Patience is the word of the day with tattoo removal. Sometimes we can remove all the pigment; sometimes we can only lighten it. Microscopic particles of iron oxide/organic pigments have been tattooed into the skin because we want them to stay there. Carbon ink may be more difficult to remove.
Before I attempt tattoo removal I always try to find alternatives. For example, on the brows, I always ask people if their brows will grow and possibly cover all or part of the tattoo. In many cases (see When Not to Tattoo on my web page) people have been over tweezing, over waxing/threading, or shaving their brows. I encourage them to let their brows grow and I get them through the growing in stages so they can just color in the design I have created for them. This approach makes it much easier to get through the growing in period. This can take up to three months depending on how fast they grow. In many instances they have a full or almost full brow. If the unwanted tattoo still shows in certain areas, then we only go after those areas with removal. In the end what could be better than your own beautiful well shaped brow. If some areas don’t come in completely, you can fill them in or re tattoo but be careful. Many tell me that they are done tattooing and are going back to the old fashioned way of filling them in.
If hair won’t come back at all or only very little, or if the tattoo shape is ok and the color has changed, we can correct the color and we can also correct the shape with additional tattooing placed correctly to fool the eye. We can also lighten or remove eyeliner, lip liner and tattooed beauty marks. I still try to find an alternative for these procedures before we attempt removal. No, I do not use a camouflage color to cover up the unwanted tattoo.
There are a number of techniques to try to remove pigment: Saline, clay, laser, glycolic acid, lemon oil are among the most popular. There are others but we don’t know the exact ingredients because the manufacturer says the ingredients are proprietary.
Even though new lasers are supposed to recognize all colors, that isn't always the case. Often laser can cause permanent makeup colors to turn gray or red or yellow. Sometimes laser can get out the permanent makeup. I can also try to remove or lighten small tattoo's and colors on the body that laser does not recognize.
The product that I use for tattoo removal doesn’t care what color the pigment is, it is just trying to lift the pigment out of the dermis, up through the epidermis, then forming a scab which exfoliates with pigment in it.
How much comes out in any given appointment is unknown. It all depends on what the body gives up during that session. We wait a minimum of 35 days between treatments. Sometimes longer depending on how a person heals. Then we repeat the treatment until it fades or is gone.
Often we reach a certain point and the client says that is good enough and we stop.
I use topical anesthetic to keep you comfortable during the procedure. It is very important to keep the area we have worked on absolutely dry until the scab falls off. Don’t plan to do this work before a sun vacation or a special occasion for at least 10 days. You cannot be pregnant or nursing. If you have any medical issues that might preclude you from having tattoo removal it is important to get clearance from your doctor.
Don’t have tattoo removal before a cosmetic procedure such as laser or peels that might interfere with healing the removal area.
Contact me for a consultation. You are welcome to send me up close, clear pictures of the area to my cell phone or email (see below). You don’t have to make any decisions at that time, you are welcome to think about it. I want everyone to be comfortable with their decision.
If you have questions you can call me (818) 326-9982 or email: carol@carolpackman.com
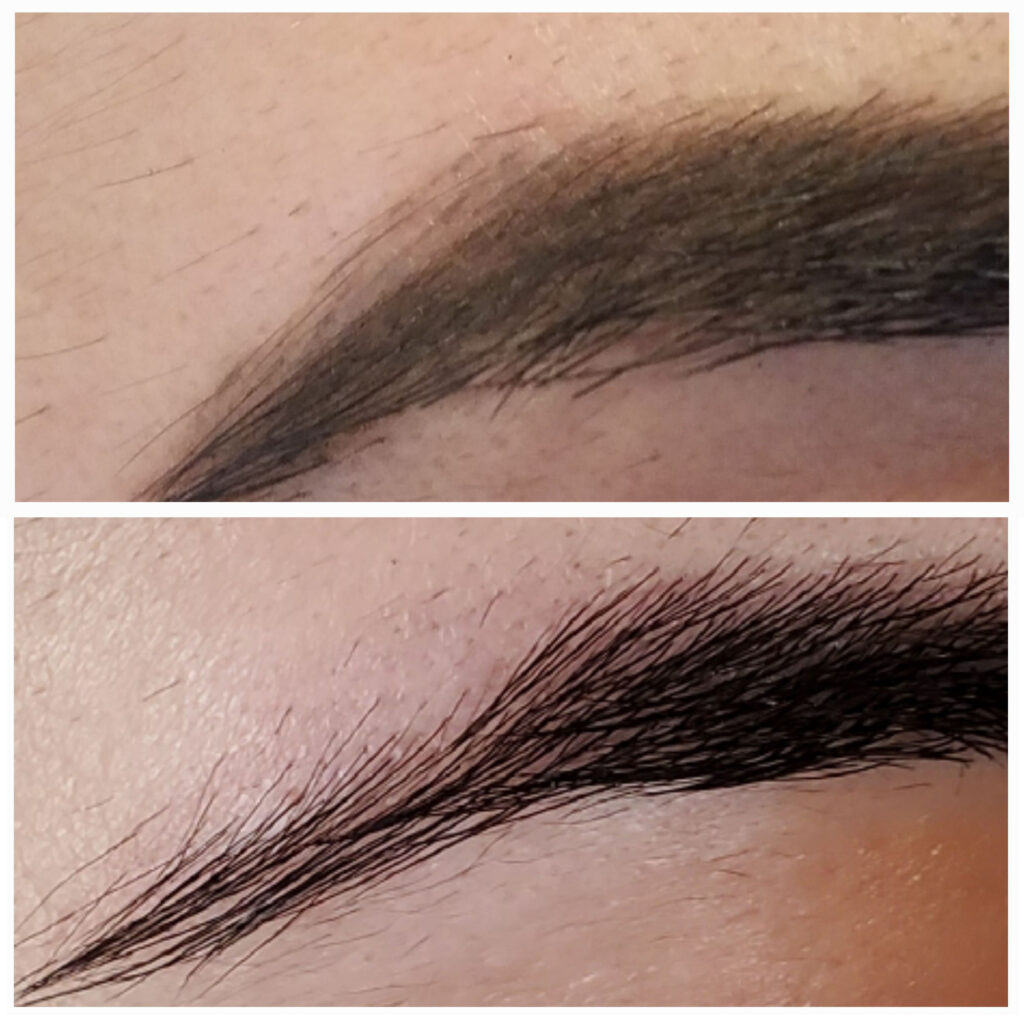
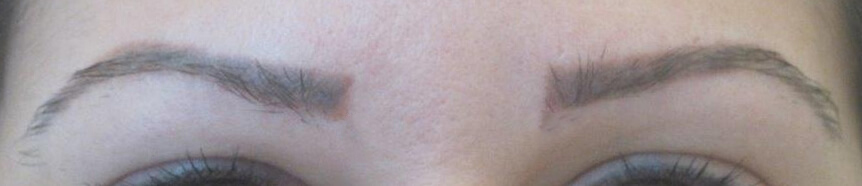
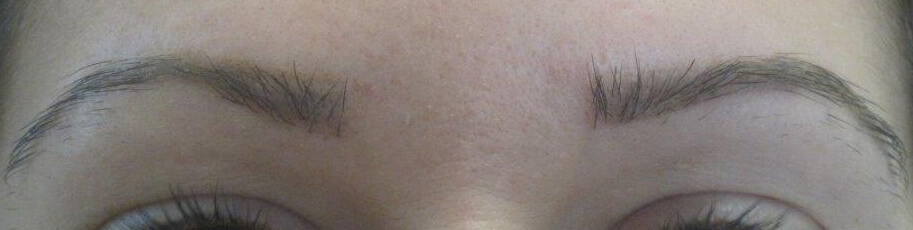
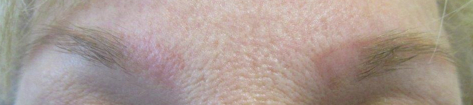
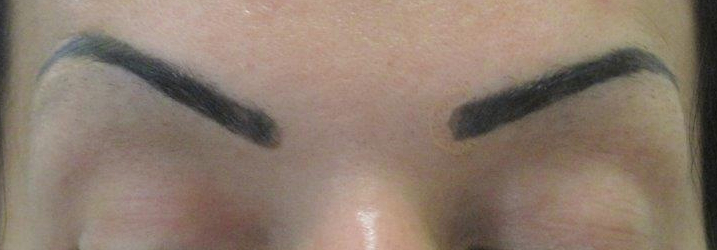
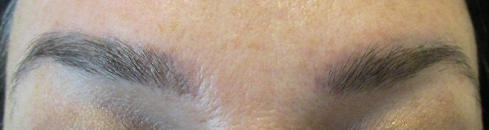
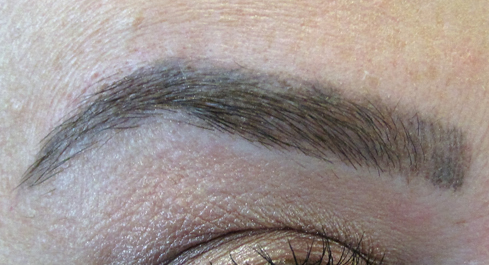
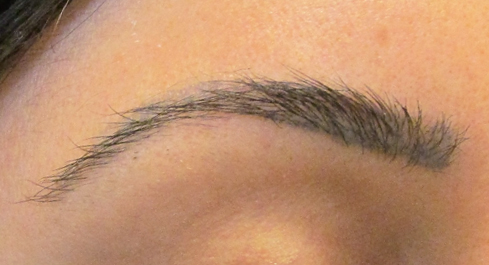
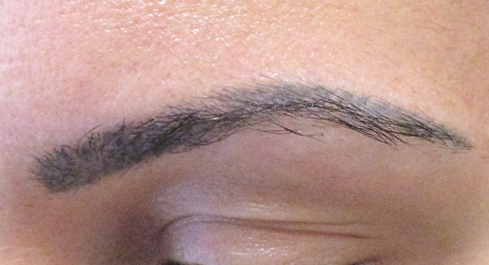
Set #1
Before and After Saline Treatment
Before (top) After (bottom)
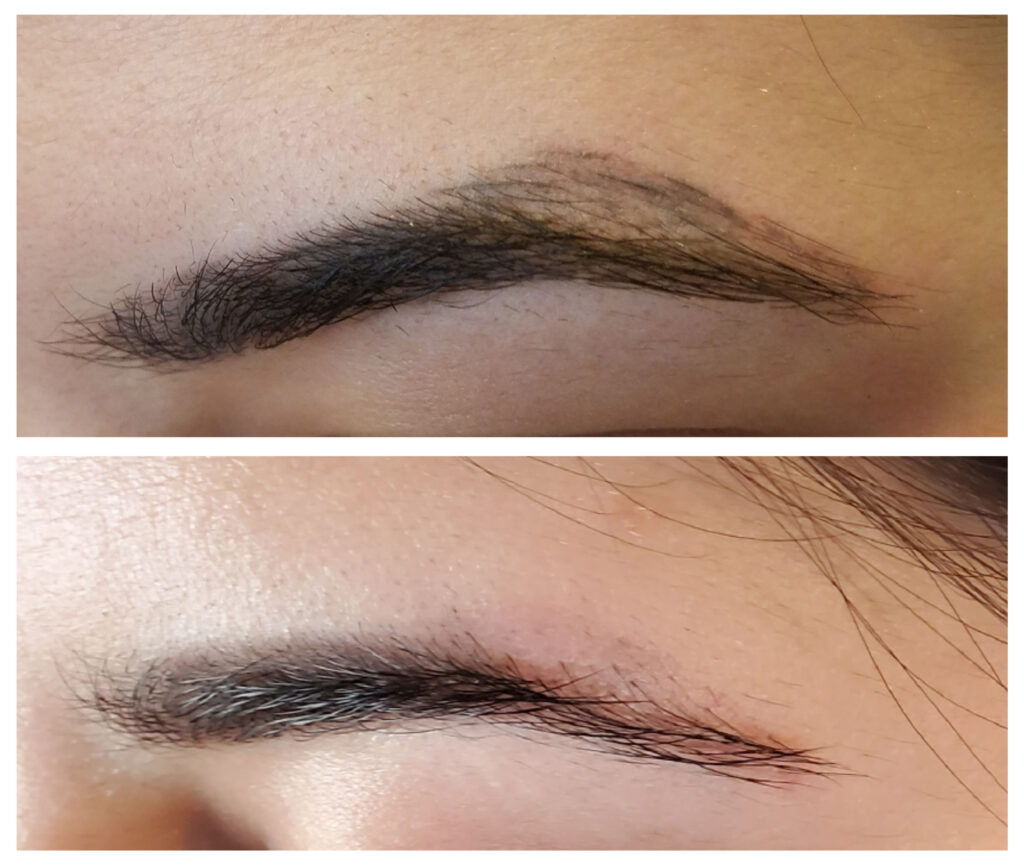
Before (top) After (bottom)
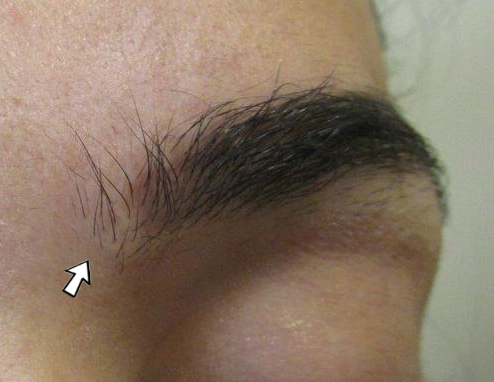
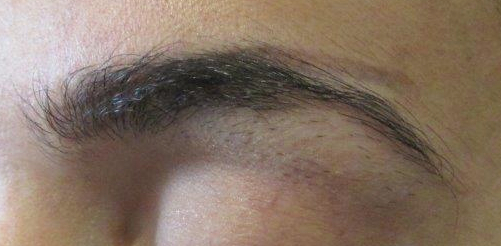
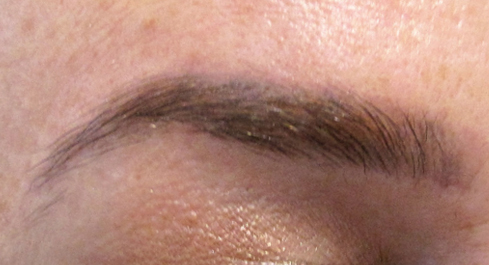
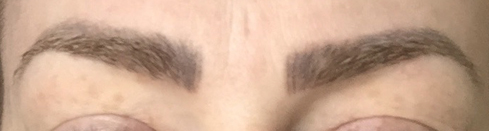
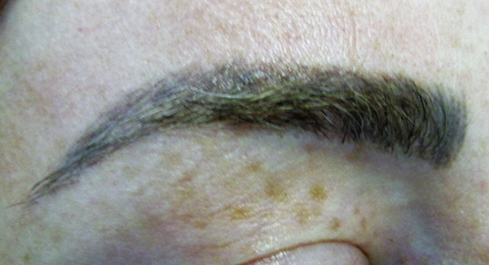
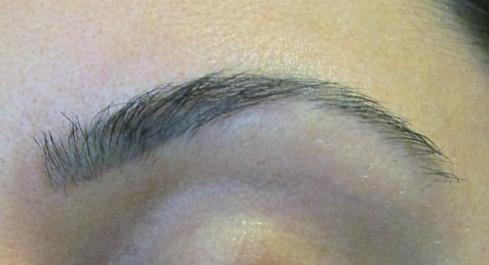
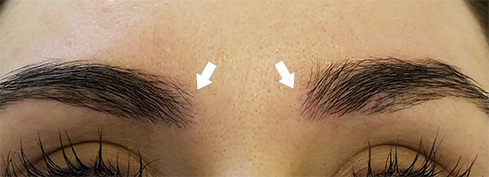
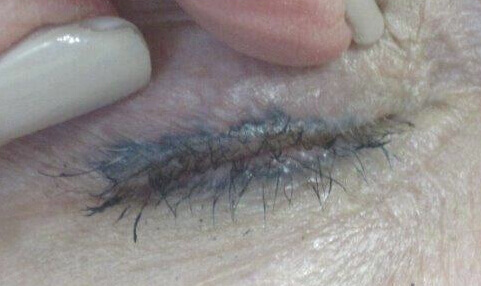
Set #2
Before Saline Treatment
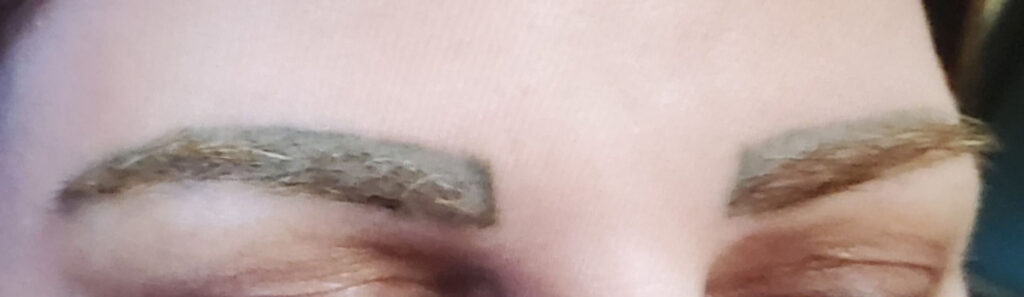
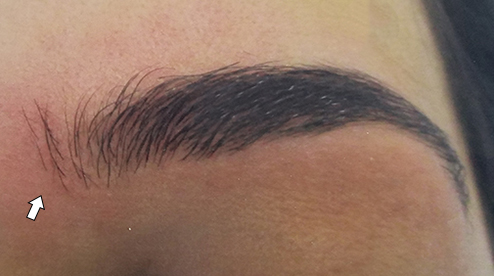
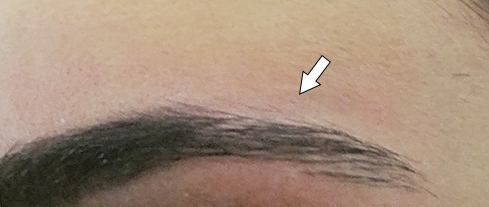
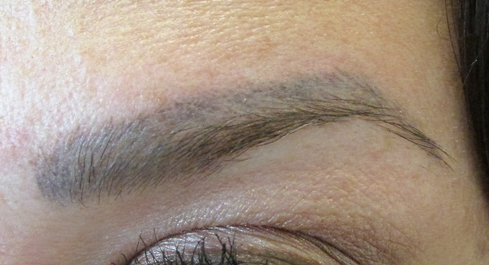
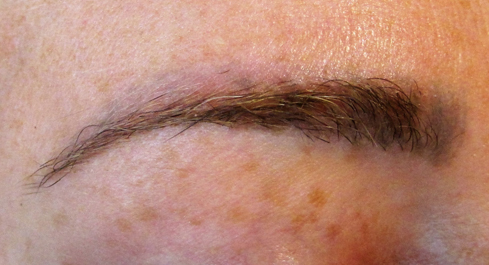
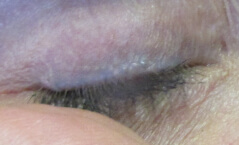
Pictured below is mid-progress. Considerable amount of pigment has been removed and the transplants have been trimmed
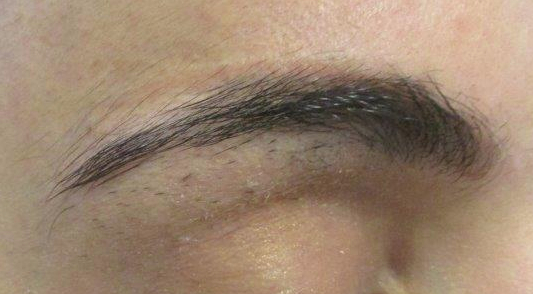
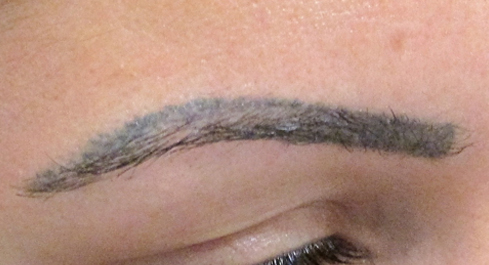
After - Pigment almost gone, transplants untrimmed
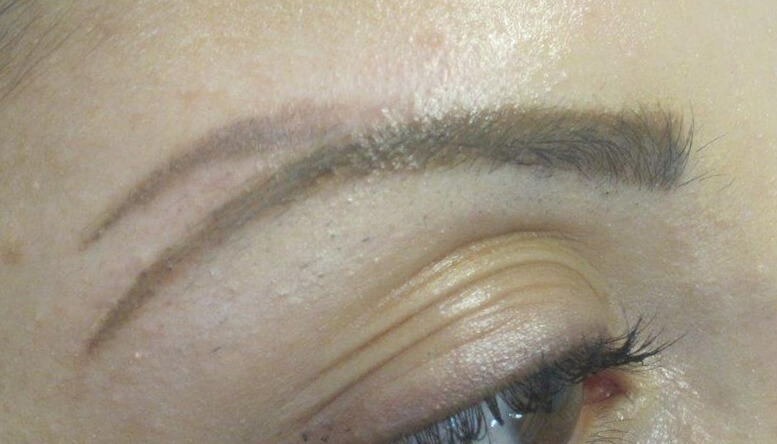
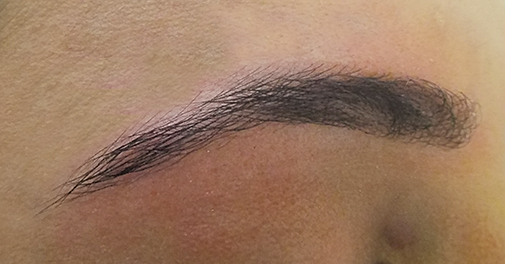
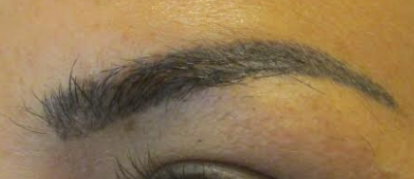
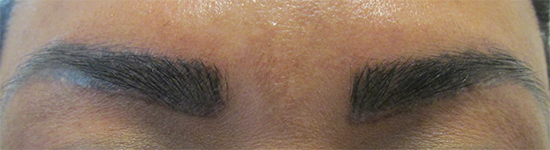
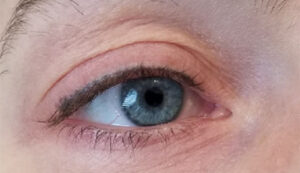
Set #3
Before Tattoo Removal
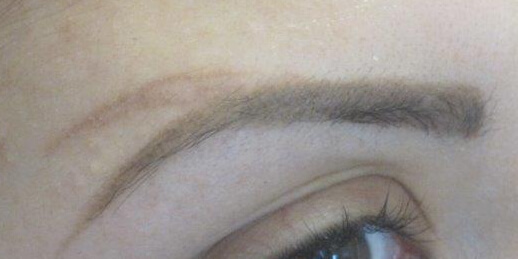
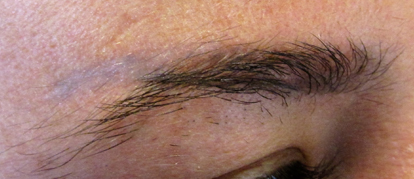
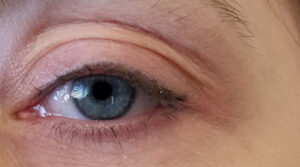
After Tattoo Removal
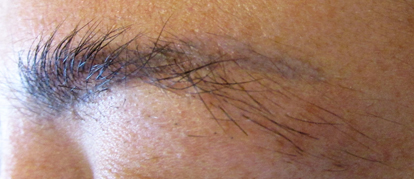
Set #4
Before Tattoo Removal
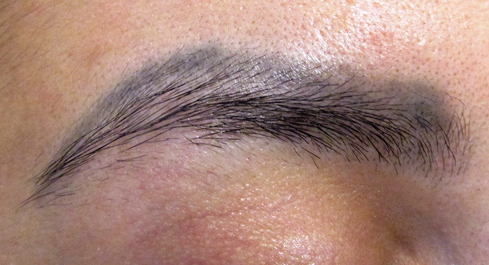
After Tattoo Removal
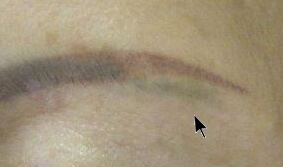
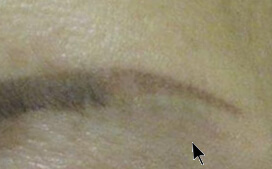
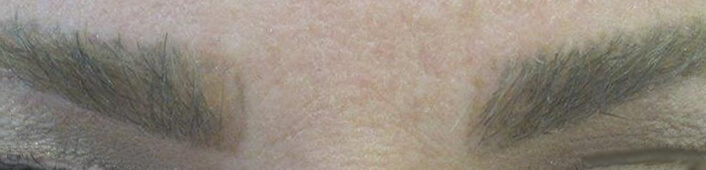
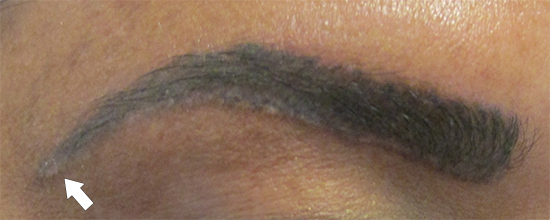
Set #5
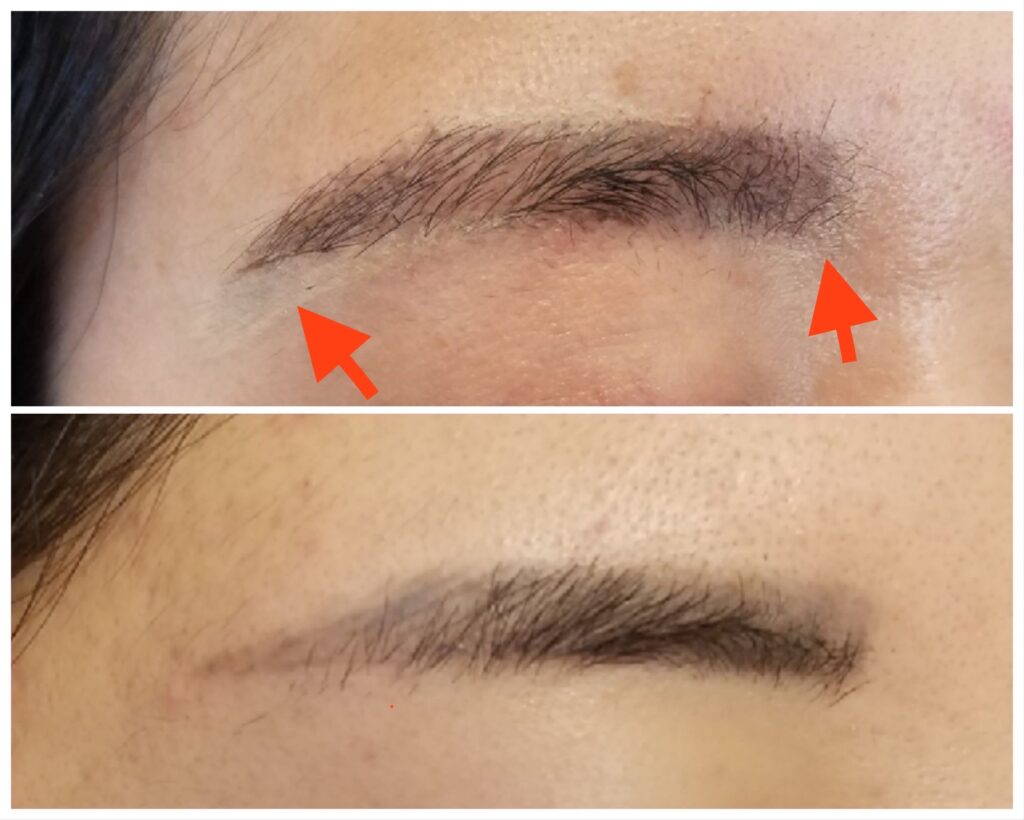
Before Removal of Gray Area Under Tail
After Brow Removal, Almost Gone
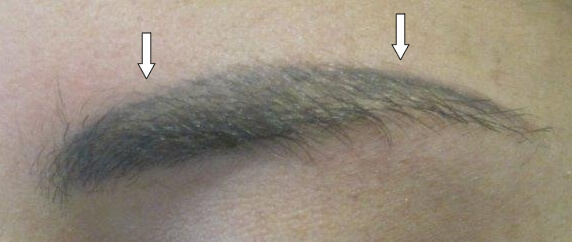
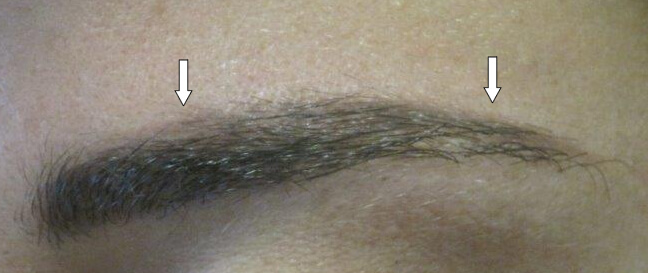
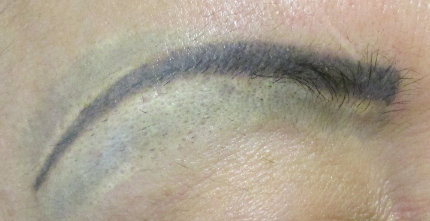
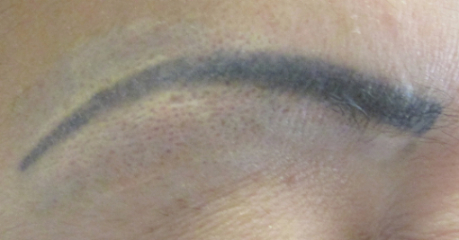
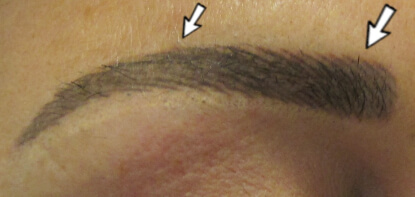
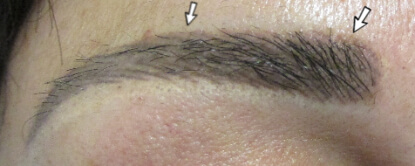
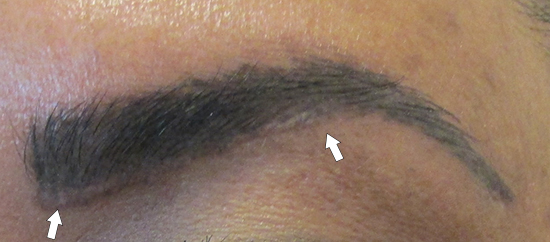
Set #6
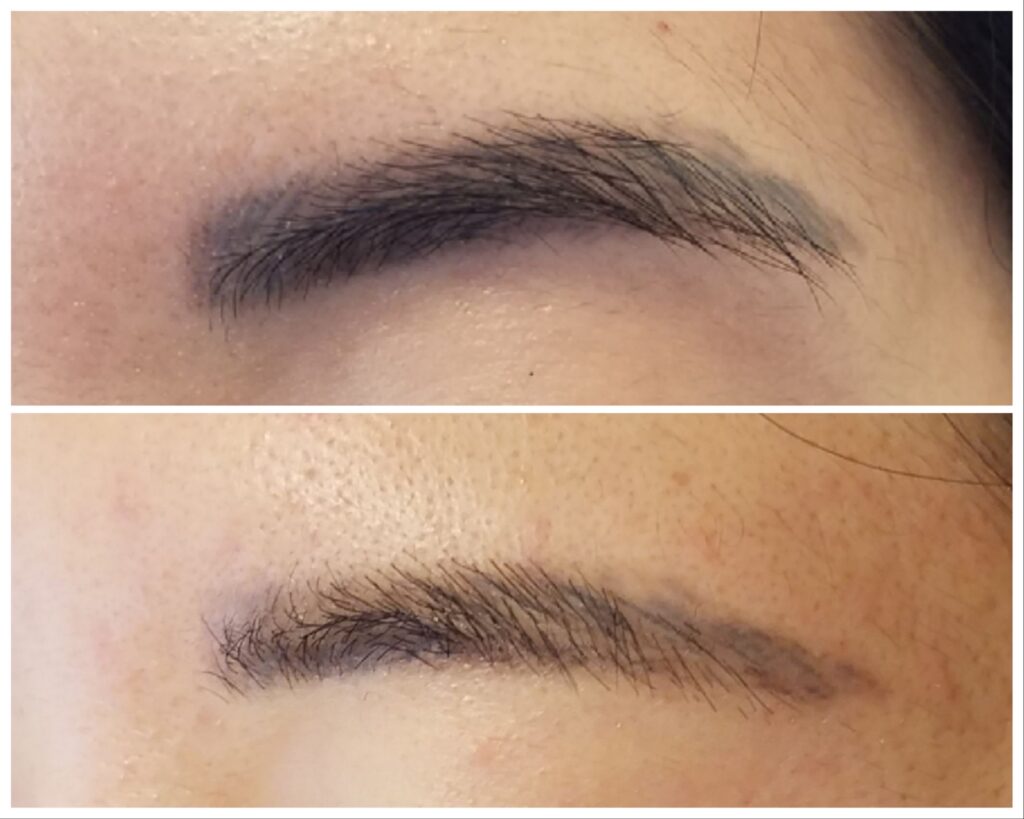
Before Removal of Upper Arch to Tail
Brow Removal After 2 Appointments, More Work Needed
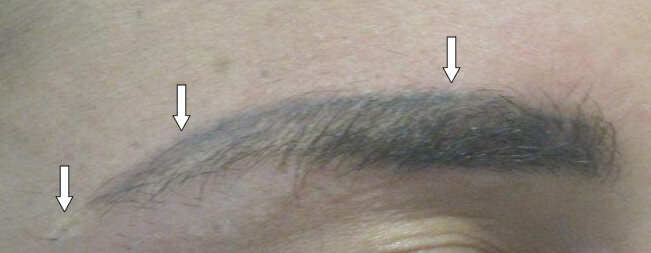
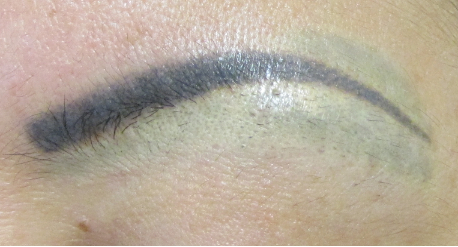
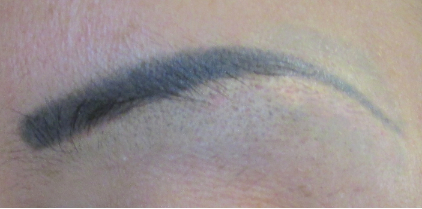
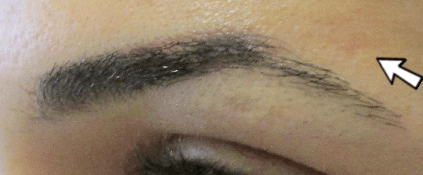
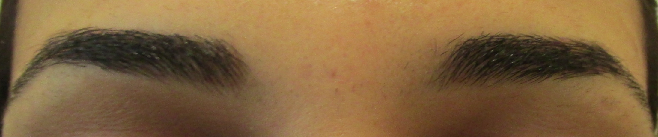
Set #7
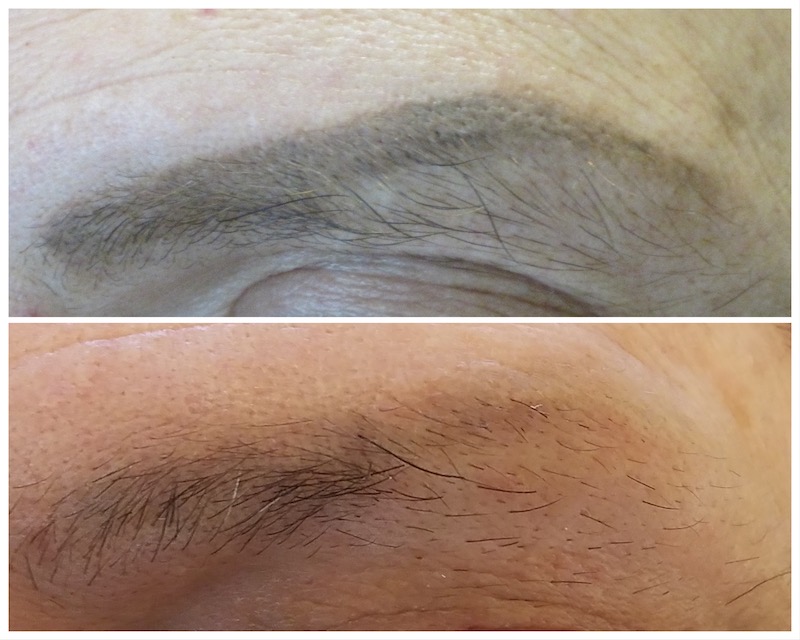
Before Removal: Front of Brow

After 2nd Appointment
Much improved; More work needed
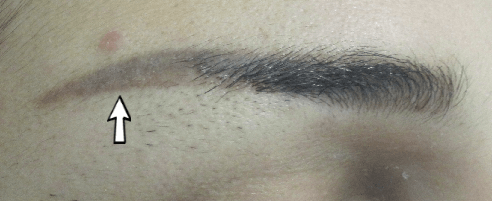
Set #8
Before Removal of Dark Line on Top of Brow
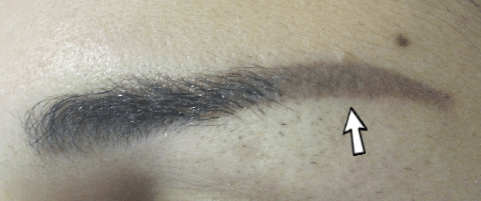
Healed After 3rd Removal Treatment. Grey Pigment Gone. Underlying Red Pigment Still Needs to be Removed. We could stop with removal at this point, but client wants to continue.
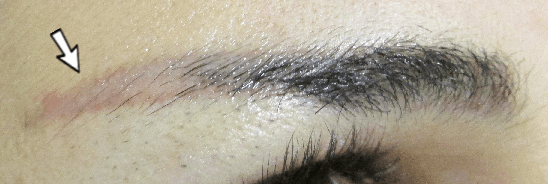
Before Removal of Dark Line on Top of Brow and White Pigment at End of Tail
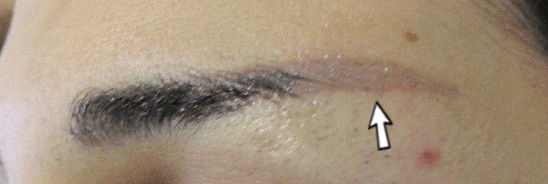
Healed After 3rd Removal Treatment. Grey Pigment Gone. Underlying Red Pigment Still Needs to be Removed. We could stop with removal at this point, but client wants to continue.
White Pigment is Gone at End of Tail.

Set #9
Before
After

Set #10
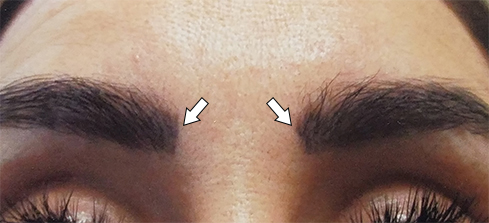
Before saline permanent makeup removal.
Incorrect placement of brow fronts.
Results after 4 treatments of saline removal.
We may do another treatment depending on how the results turn out after her most recent treatment. Very often if the result is quite faded and can be covered with just a little makeup, people will opt to do that and just let it continue to fade.
Set #11
Arches were tattooed much too high. Much of her own brow was taken off.
You will see her own natural brow starting to grow in the next few pictures.
Tech made a mistake in the front of this brow and covered it with flesh tone pigment.
Never cover a mistake with a mistake.
We are also removing the arch to the tail because she wants to regrow her own brow and the tail is too high.

Flesh tone is almost completely faded.
Her brows have since grown in and also cover the red that you see.
Front is even more improved.
Front and tail is quite faded and her own brow hair is growing in.
Brow has completely grown in. Upper tail is removed.
The tail was misplaced and covered with flesh tone.
Look closely under the tail.

Tail is quite faded and her own brow is growing in.
Old tattoo is gone. We've altered the picture and taken out the redness from tweezing to clearly emphasize how much of her own brow has come in. As you can see, she never needed tattooing in the first place.
Set #12
The original technician covered up mistakes with skin tone camouflage pigment which made it worse. The "after" pictures are after one appointment. This is not typical. We still need to do more removal. This is a very good response after one treatment. Most procedures can take 3 or more appointments to either lighten or remove pigment. As one color comes out, the underlying pigments may appear. Everyone is different.
Before Removal — Right Brow
After Removal — Right Brow
Removal after one appointment only
Before Removal — Left Brow
After Removal — Left Brow
Removal after one appointment only
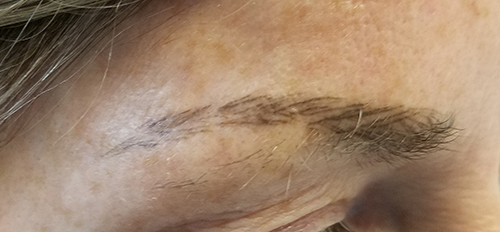
Set #13
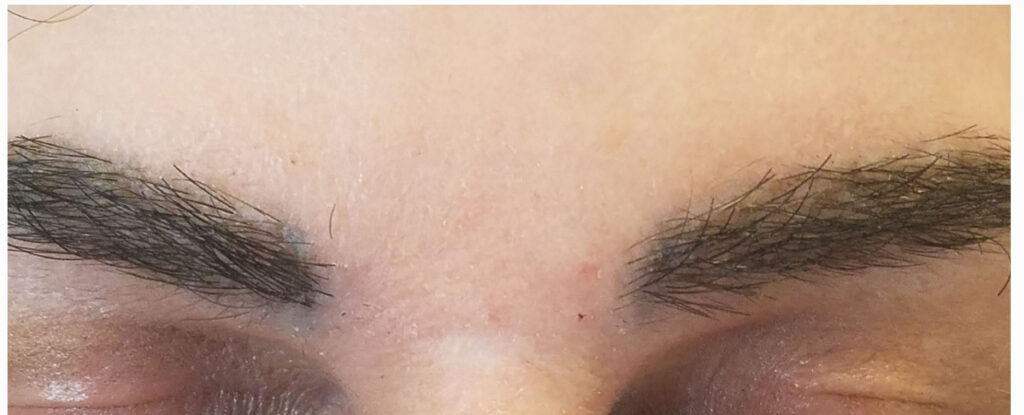
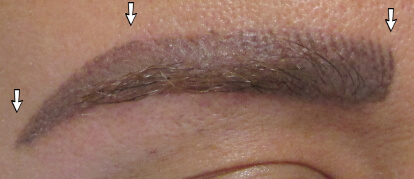
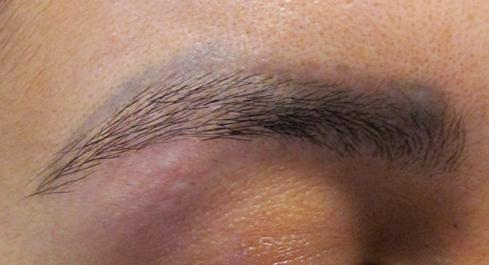
Her own brow hair from arch to tail was removed because she wanted a different shape from her own brow. Now she wants to remove the tattoo and let her own brow hair come in. Areas were tattooed multiple times which required many removal treatments.
Before Removal of Arch to Tail

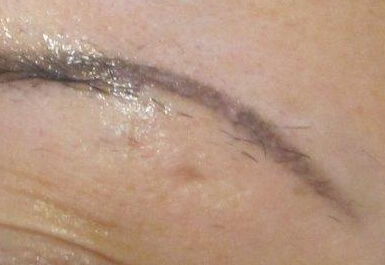
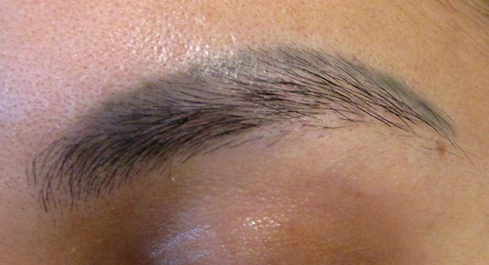
Before Removal - Side Views of Left & Right Brow Arch-to-Tail
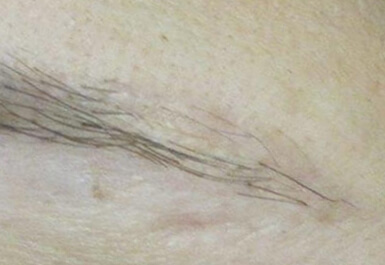
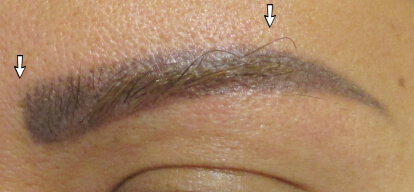
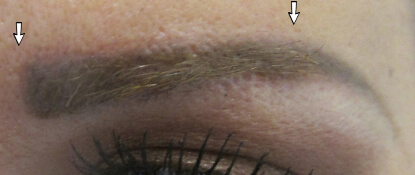
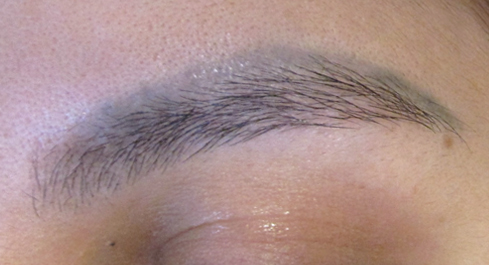
Side Views of Left & Right Brow Arch-to-Tail After 6 Treatments of Removal
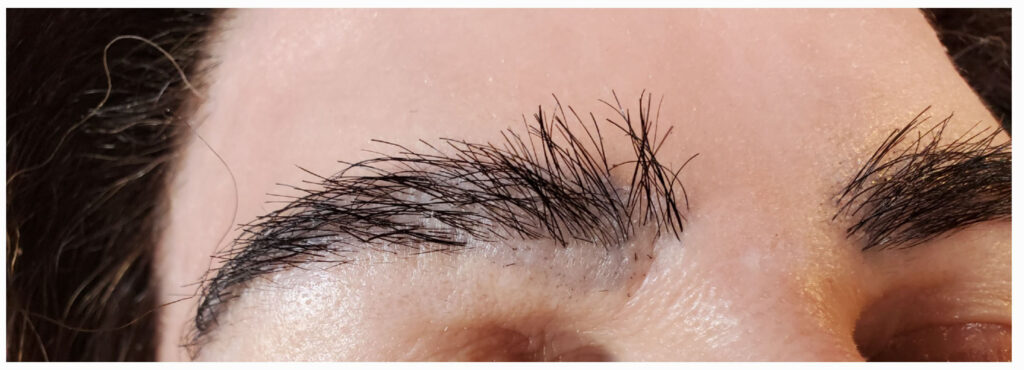
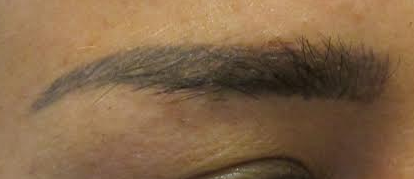
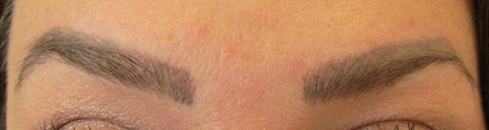
Arch-to-Tail Tattoo Almost Completely Gone and Her Natural Brow Shape is Growing In

Her brow has now completely grown in and is a much more flattering shape than the original tattoo.
Set #14
Before Removal of Top and Front of Brow
After Second Removal of Top and Front of Brow
Possibly one more appointment will fade it more or get it all out.
Set #15
Before

Brows are too wide and we are removing from the top down to make it more proportionate. See After pictures below.
More work needed.

Before Removal
After
Removal has lightened it considerably. More work needed.
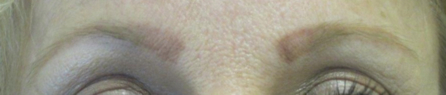
Set #16
Before
Arch to tail too high
After
Tattoo is fading, more work needed.
She is letting her own brows grow back in.
Set #17
Before
After
Removal - more work needed
Before
After
Removal - more work needed
Set #18
Before
After
We did one more treatment after this picture.
Before
After
Before
After
As one color comes out another can appear as you can see by the pinky mauve tone. It is at this point that the client can decide that this is good enough or we can continue the process.

Set #19
Before
Even though this is a full brow, in keeping with today's trend, the client felt they were filled in too close and too big and wanted to get back to her natural brow.
Before
After
As one color comes out another can appear as you can see by the pinky mauve tone. It is at this point that the client can decide that this is good enough or we can continue the process. More work needed.
Before

After
More work needed

Set #20
Before
After
Before
After
Set #21
Before Saline Removal
After Saline Removal
Set #22
Before
Client thinks brow is too big and technician used flesh tone pigment to cover up a mistake.
After
She wanted to get back to her own thin brow.
This is after removal.

Set #23
These are progress pictures before and after. More work is needed if she chooses.
Before (top) & After (bottom)
Note: in the top picture yellow camouflage pigment in the front of the brow and underneath the tail. And in the bottom picture removed camouflage pigment and some of the tattoo.
Before (top) & After (bottom)
Set #24
This person is a male. Pigment is 99% gone. Did one more removal at this appointment.
Before (top) & After (bottom)

Before (top) & After (bottom)
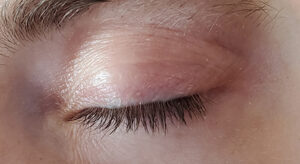
Eyeliner Removal
Set #1
Set #2
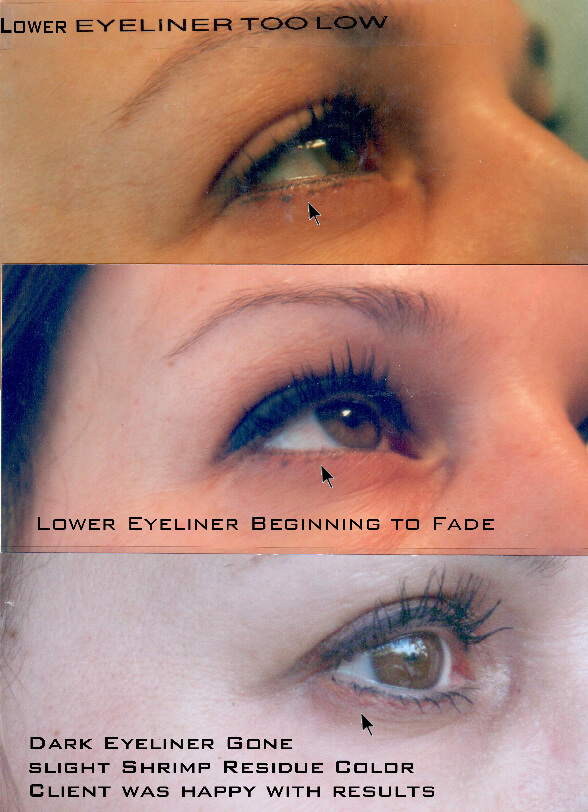
Before
Upper liner was not tattooed properly.
Liner quite faded after removal.
Set #3
She didn’t like the eyeliner on the top lid and we removed it.
Before (top) & After (bottom)

Before (top) & After (bottom)
Permanent Lip Makeup Removal
Set #1
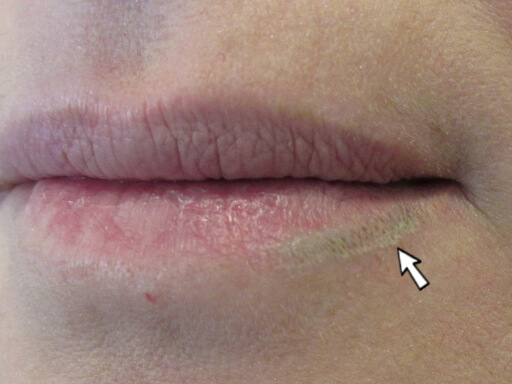
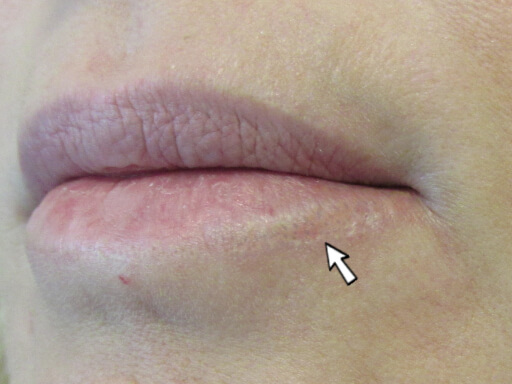
Another tech tried to re-pigment the corners of her mouth after she lost her own pigment. The original flesh tone pigment turned white. I used saline to remove the white pigment.
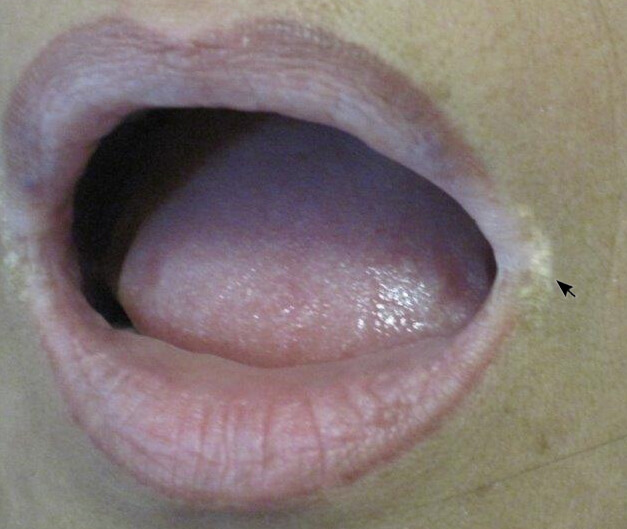
Result from removal after two appointments. There is still residual white pigment. I recently did another treatment and I will post that picture in about 6 weeks.

Before Saline Removal
Results from removal after 1 appointment.
We may attempt another treatment in the future.
Set #2
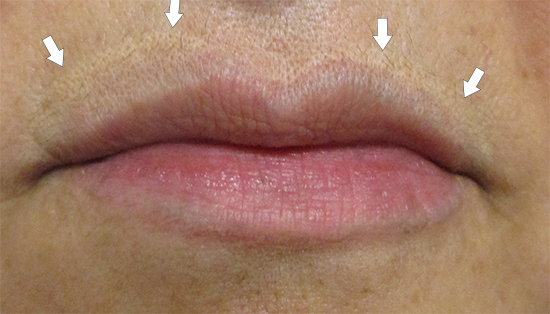
Before
Pigment was placed outside the lip line and then covered up with flesh tone pigment.
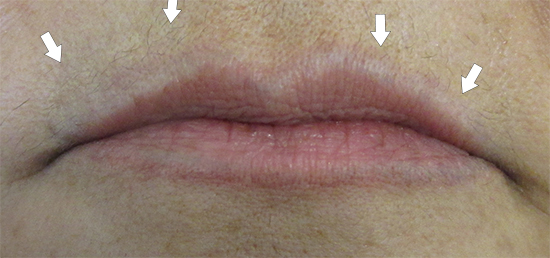
After 2 Appointments
Gray is gone.
More work is needed to remove the white color.
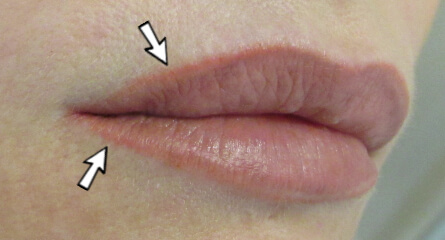
Set #3
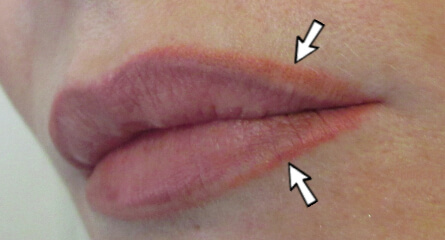
Before
Before removal of the left upper and lower lip line.
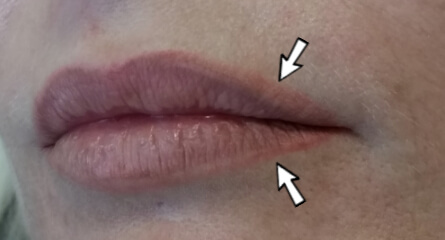
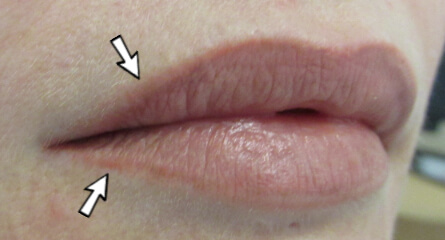
After
After removal of the left upper and lower lip line.
More work needed.
Before
Before removal of right upper and lower lip line.
After
After removal of the right upper and lower lip line.
More work needed.
Set #4
Before
Lip color was placed too high and then they tried to cover up a mistake with a mistake with flesh tone over it.
After
We got most of it out.
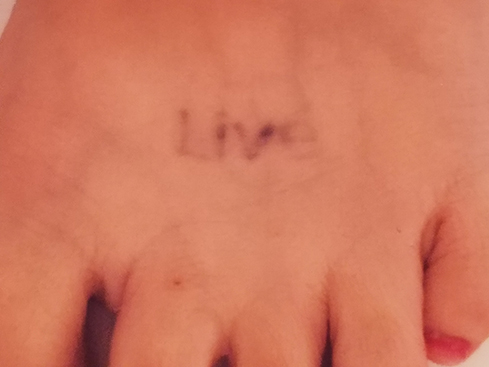
Foot Tattoo Removal
Set #1
Before Saline Removal
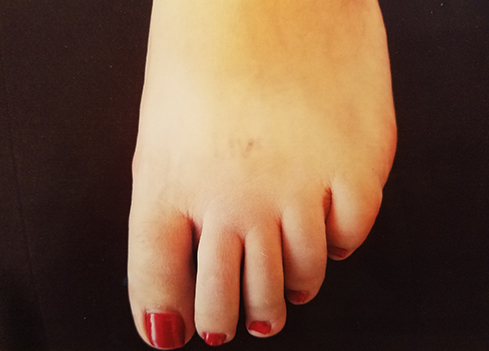
After 3 Saline Treatments
We did one more treatment after this.
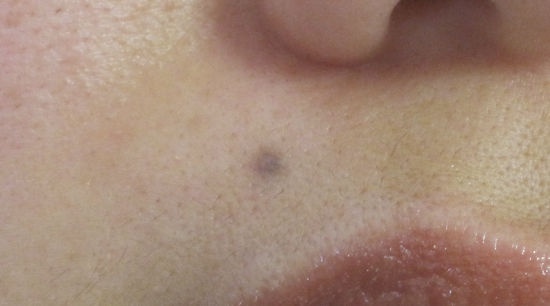
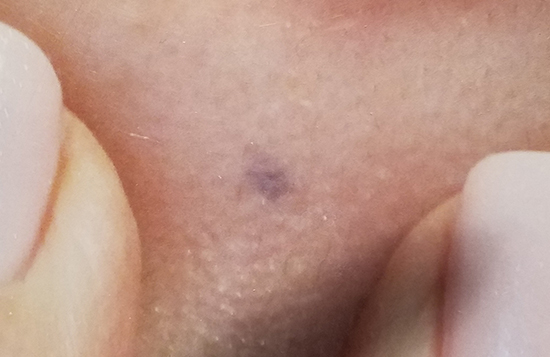
Beauty Mark
Set #1
Before
Removal of pigment migrating outside of beauty mark.
After
Beauty mark now a better shape.